Hi everyone, I hope you liked the last post about Installation of PyGame. Today we will learn a little more, in this PyGame Sprite Animation Tutorial. So it is clear from the name itself that we are going to draw a character inside the window, and we will make the character walk. I hope you already know about 2d Animation. The basic concept is we draw images in a loop creating an illusion of movement.
With PyGame making sprite animation is super easy. The hard part is creating the sprite 😉 but don’t worry I have the sprites for you.
Contents
What is Sprite?
In computer graphics any bitmap that is drawn in our game window is called a Sprite. So if you do not like the name “Sprite”, you can consider it the image that you are going to draw in your game.
Designing a Sprite
As I told you this is the hard part, so for designing a sprite you can use any tool available there for example photoshop, illustrator etc. Just google it and you will find a lot of online tools as well.
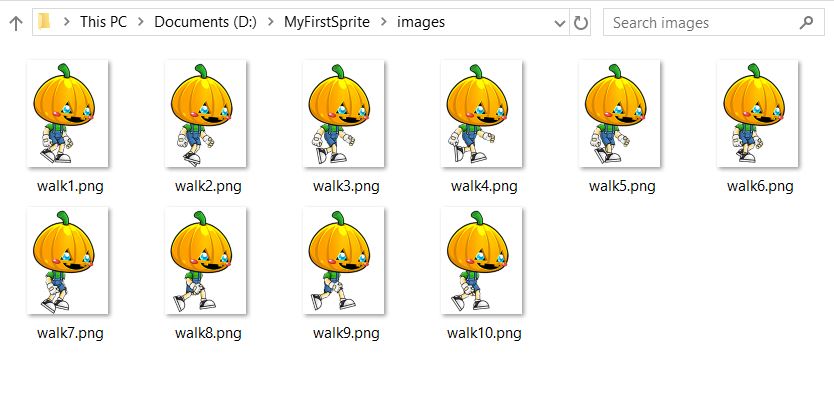
But don’t worry, for following this tutorial you do not need to design a character, I have a sprite for you, and it is for walking cycle.
I found the above sprite from here: Game Art 2D. You can find some good free game assets from here.
PyGame Sprite Animation
Now let’s learn how we can implement the sprite animation using pygame.
Creating a new Project
- Just create a new folder anywhere in your computer. I have created a folder named MyFirstSprite.
- Inside the folder MyFirstSprite, create one more folder named images. And paste all the sprite images that you downloaded.

- Now inside the same folder (not inside images, inside MyFirstSprite folder) create a new file named game.py.
- Open the file in any code editor, I am using Visual Studio Code.
Importing PyGame and Defining Constants
- On the top of the file game.py write the following code.
|
1 2 3 4 5 6 7 8 |
import pygame SIZE = WIDTH, HEIGHT = 600, 400 #the width and height of our screen BACKGROUND_COLOR = pygame.Color('white') #The background colod of our window FPS = 10 #Frames per second |
- So we have imported pygame and also defined some constants. You can change the values if you want.
Creating our Sprite
- For our sprite we will create a class. So below I have my class named MyFirstSprite, you have to write the same code.
|
1 2 3 4 5 6 7 8 9 10 11 12 13 14 15 16 17 18 19 20 21 22 23 24 25 26 27 28 29 30 31 32 33 34 35 36 37 38 39 |
class MySprite(pygame.sprite.Sprite): def __init__(self): super(MySprite, self).__init__() #adding all the images to sprite array self.images = [] self.images.append(pygame.image.load('images/walk1.png')) self.images.append(pygame.image.load('images/walk2.png')) self.images.append(pygame.image.load('images/walk3.png')) self.images.append(pygame.image.load('images/walk4.png')) self.images.append(pygame.image.load('images/walk5.png')) self.images.append(pygame.image.load('images/walk6.png')) self.images.append(pygame.image.load('images/walk7.png')) self.images.append(pygame.image.load('images/walk8.png')) self.images.append(pygame.image.load('images/walk9.png')) self.images.append(pygame.image.load('images/walk10.png')) #index value to get the image from the array #initially it is 0 self.index = 0 #now the image that we will display will be the index from the image array self.image = self.images[self.index] #creating a rect at position x,y (5,5) of size (150,198) which is the size of sprite self.rect = pygame.Rect(5, 5, 150, 198) def update(self): #when the update method is called, we will increment the index self.index += 1 #if the index is larger than the total images if self.index >= len(self.images): #we will make the index to 0 again self.index = 0 #finally we will update the image that will be displayed self.image = self.images[self.index] |
- The above code is pretty much self explanatory, and I have also added the comments. But still if you think you are not getting something, please leave your comment.
Drawing the Sprite
- Now let’s draw the sprite that we created.
|
1 2 3 4 5 6 7 8 9 10 11 12 13 14 15 16 17 18 19 20 21 22 23 24 25 26 27 28 29 30 31 32 33 34 35 36 37 38 39 40 41 42 |
def main(): #initializing pygame pygame.init() #getting the screen of the specified size screen = pygame.display.set_mode(SIZE) #creating our sprite object my_sprite = MySprite() #creating a group with our sprite my_group = pygame.sprite.Group(my_sprite) #getting the pygame clock for handling fps clock = pygame.time.Clock() while True: #getting the events event = pygame.event.get() #if the event is quit means we clicked on the close window button if event.type == pygame.QUIT: #quit the game pygame.quit() quit() #updating the sprite my_group.update() #filling the screen with background color screen.fill(BACKGROUND_COLOR) #drawing the sprite my_group.draw(screen) #updating the display pygame.display.update() #finally delaying the loop to with clock tick for 10fps clock.tick(10) |
- Now finally we need to call main.
|
1 2 3 4 |
if __name__ == '__main__': main() |
The final Code
- After doing everything your file game.py will be like this.
|
1 2 3 4 5 6 7 8 9 10 11 12 13 14 15 16 17 18 19 20 21 22 23 24 25 26 27 28 29 30 31 32 33 34 35 36 37 38 39 40 41 42 43 44 45 46 47 48 49 50 51 52 53 54 55 56 57 58 59 60 |
import pygame SIZE = WIDTH, HEIGHT = 600, 400 #the width and height of our screen BACKGROUND_COLOR = pygame.Color('white') #The background colod of our window FPS = 10 #Frames per second class MySprite(pygame.sprite.Sprite): def __init__(self): super(MySprite, self).__init__() self.images = [] self.images.append(pygame.image.load('images/walk1.png')) self.images.append(pygame.image.load('images/walk2.png')) self.images.append(pygame.image.load('images/walk3.png')) self.images.append(pygame.image.load('images/walk4.png')) self.images.append(pygame.image.load('images/walk5.png')) self.images.append(pygame.image.load('images/walk6.png')) self.images.append(pygame.image.load('images/walk7.png')) self.images.append(pygame.image.load('images/walk8.png')) self.images.append(pygame.image.load('images/walk9.png')) self.images.append(pygame.image.load('images/walk10.png')) self.index = 0 self.image = self.images[self.index] self.rect = pygame.Rect(5, 5, 150, 198) def update(self): self.index += 1 if self.index >= len(self.images): self.index = 0 self.image = self.images[self.index] def main(): pygame.init() screen = pygame.display.set_mode(SIZE) my_sprite = MySprite() my_group = pygame.sprite.Group(my_sprite) clock = pygame.time.Clock() while True: for event in pygame.event.get(): if event.type == pygame.QUIT: pygame.quit() quit() my_group.update() screen.fill(BACKGROUND_COLOR) my_group.draw(screen) pygame.display.update() clock.tick(10) if __name__ == '__main__': main() |
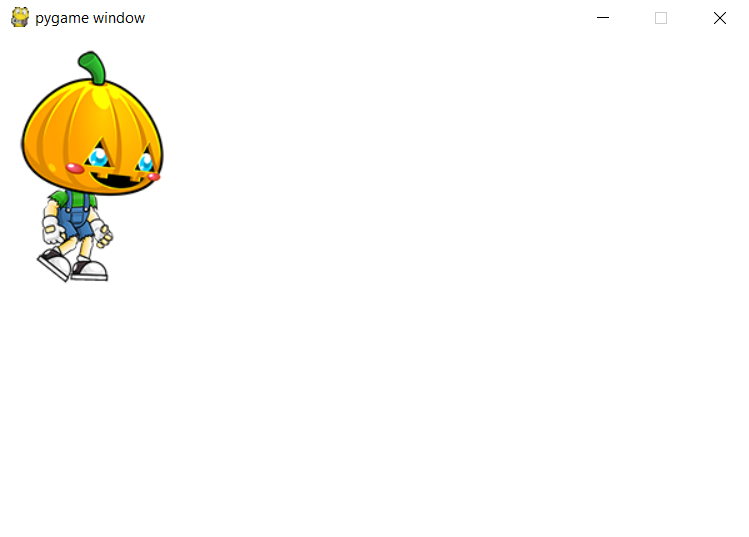
- Now just run your code and you will see the chracter moving.

So that’s all for this PyGame Sprite animation tutorial friends, let me know in comments if you are having any query. Thank You 🙂
