In this Django Forms Example we will see how to use Django Form class to generate Web Forms. A form is very basic need of any web application. And generating forms in Django using the Form class is very easy. And thats it what we will be learning in this Django Forms Example.
If you are an absolute beginner in Python Django you should start reading from the first post. You can go to the first post from the link given below.
Python Django Tutorial for Beginners
This time we will use Sublime Text Editor, as I got request that many of you don’t have PyCharm IDE, as it is a paid tool. And I got a MAC as well so I will be crating the project from Scratch using terminal. You can use the same with power shell as we did in the very first Django Tutorial. So lets start this Django Forms Example.
Starting a New Django Project
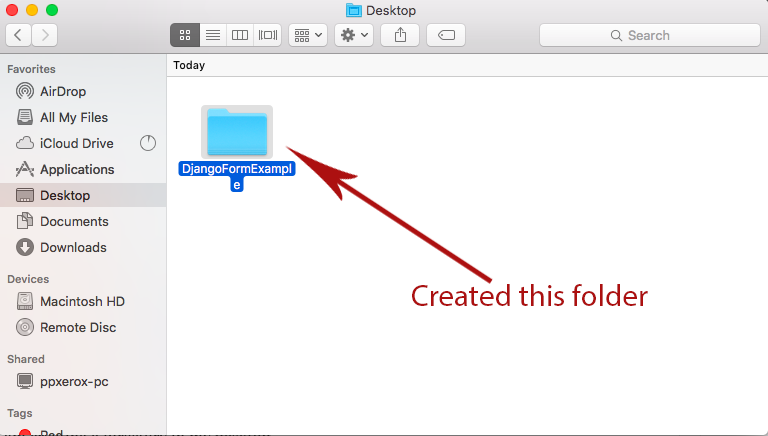
- First create a new directory, I am creating a directory in my desktop.

- Now open terminal and navigate to this folder.
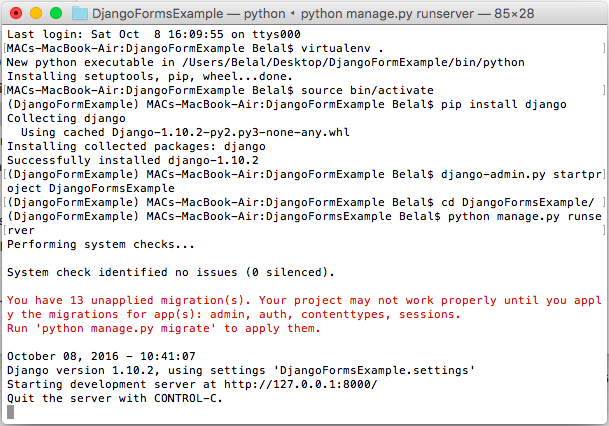
- Now run the following command to create a virtual environment.
|
1 2 3 |
$ virtualenv . |
- It will create a virtual environment in the current directory. Now we need to activate it. So run the following command.
|
1 2 3 |
$ source bin/activate |
- Now install Django Framework using the following command.
|
1 2 3 |
$ pip install django |
- Now lets create a new Django Project using the following command.
|
1 2 3 |
$ django-admin.py startproject DjangoFormExample |
- In the above command DjangoFormExample is our project name you can change it to whatever you want.
- Now navigate to your project directory.
|
1 2 3 |
$ cd DjangoFormExample |
- Now try running your project using the following command.
|
1 2 3 |
$ python manage.py runserver |
- If you are getting the following message on terminal then its fine. If not recheck the process 😛

- You can go to the given IP to test your project.
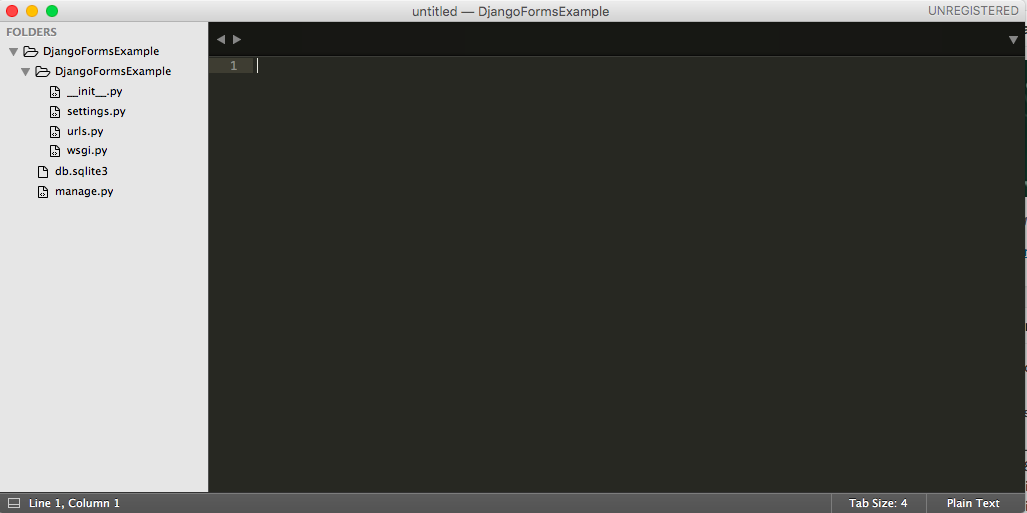
- Now open the Project Folder to your Editor, I am using Sublime as it is really cool.

Starting a New Application
- We have the project running now we will create a new app inside our project. To create a new app write the following command in terminal.
|
1 2 3 |
$ python manage.py startapp newsletter |
- After running this command you will get a new folder created inside your project named newsletter.
- Now inside this newsletter folder create a new folder named templates. We will store our html files inside this folder.
Creating Form
- Inside newsletter folder create a new file named forms.py. Inside this file we will create our Form.
|
1 2 3 4 5 6 7 8 9 10 11 12 |
#importing forms from django import forms #creating our forms class SignupForm(forms.Form): #django gives a number of predefined fields #CharField and EmailField are only two of them #go through the official docs for more field details name = forms.CharField(label='Enter your name', max_length=100) email = forms.EmailField(label='Enter your email', max_length=100) |
- Currently we are using CharField and EmailField. Go to this link to know about the available form fields in Django.
Creating View
- Come inside views.py to create a new view for our form.
|
1 2 3 4 5 6 7 8 9 10 11 12 13 14 15 16 17 |
from django.shortcuts import render # Create your views here. def signupform(request): #if form is submitted if request.method == 'POST': #will handle the request later else: #creating a new form form = SignupForm() #returning form return render(request, 'signupform.html', {'form':form}); |
Defining URL Pattern for Form
- Now we need a path to show up our form in browser. So come inside urls.py file and modify it as follows.
|
1 2 3 4 5 6 7 8 9 10 11 12 13 14 |
from django.conf.urls import url from django.contrib import admin #importing views from newsletter app from newsletter import views as newsletter_views urlpatterns = [ #defining url for form url(r'^signup/', newsletter_views.signupform), url(r'^admin/', admin.site.urls), ] |
Creating Template
- Now we need an html file named signupform.html, as it is the file we are rendering from our view. Create this file inside the templates folder we created.
|
1 2 3 4 5 6 7 |
<form action="/signup/" method="post"> {% csrf_token %} {{ form }} <input type="submit" value="Submit" /> </form> |
What we did?
- If you remember the last Django Forms Tutorial, in that post we disabled the csrf protection. But we should not do this, so this time I am using the csrf protection system of Django.
- Then we are rendering the form from the view.
Adding App in Settings
- Finally we need to add the app in settings.py of the main project folder.
|
1 2 3 4 5 6 7 8 9 10 11 |
INSTALLED_APPS = [ 'django.contrib.admin', 'django.contrib.auth', 'django.contrib.contenttypes', 'django.contrib.sessions', 'django.contrib.messages', 'django.contrib.staticfiles', 'newsletter' ] |
- As you can see we added our newsletter app at the bottom.
Running the App
- Now lets try running the app make sure your development server is running. If not you can use the following command to run your development server.
|
1 2 3 |
$ python manage.py runserver |
- Now go to the url http://127.0.0.1:8000/signup/ to see your form

- If you will submit the form it will not work as we have not handled the for submission yet.
Handling Form Submission
- Again come inside views.py and modify the code as below.
|
1 2 3 4 5 6 7 8 9 10 11 12 13 14 15 16 17 18 19 20 21 22 23 24 25 26 27 28 |
from django.shortcuts import render from .forms import SignupForm # Create your views here. def signupform(request): #if form is submitted if request.method == 'POST': #will handle the request later form = SignupForm(request.POST) #checking the form is valid or not if form.is_valid(): #if valid rendering new view with values #the form values contains in cleaned_data dictionary return render(request, 'result.html', { 'name': form.cleaned_data['name'], 'email': form.cleaned_data['email'], }) else: #creating a new form form = SignupForm() #returning form return render(request, 'signupform.html', {'form':form}); |
- To complete this we need one more file named result.html inside our templates folder.
|
1 2 3 4 5 6 7 8 9 10 11 12 13 14 15 16 17 18 19 20 21 |
<h4>Thanks for Signing Up</h4> <table> <tr> <td> Name </td> <td> {{ name }} </td> </tr> <tr> <td> Email </td> <td> {{ email }} </td> </tr> </table> |
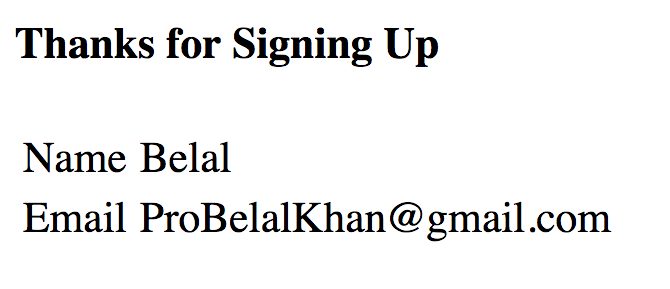
- Now try submitting the form.

- Bingo! Its working absolutely fine. If you are still facing troubles you can get my source code from below link.
Django Forms Example Source Code (2005 downloads)
So thats all for this Django Forms Example. And in the next post we will learn how to insert the form data to database in Django. Thank you 🙂


iam waiting for next post.
how to insert the form data to database in Django.
I hope you can continue this series 🙂 It was really easy to follow!
i am waiting for next post.
iam waiting for next post.
how to insert the form data to database in Django. Your posts are very very helpful, please continue